50 Pumpkin Carving Ideas and Tips
 It's one of the most iconic fall traditions — carving a cute pumpkin to put on the doorstep. Whether you're starting as a master carver or simply trying to get your family through a simple project, here are some creative tips and ideas, sorted by difficulty level, that are sure to leave a delightful first impression. It's one of the most iconic fall traditions — carving a cute pumpkin to put on the doorstep. Whether you're starting as a master carver or simply trying to get your family through a simple project, here are some creative tips and ideas, sorted by difficulty level, that are sure to leave a delightful first impression.
Keep It Simple
- Family Portrait - Carve a stick figure family portrait into the pumpkin for a cute, friendly carving.
- Sideways Pumpkin - Set the pumpkin on its side so that the stem will look like a nose, carving a face around it.
- Lightning Bugs - Draw a tree with a Sharpie and then carve out small holes (most easily with a drill) to look like lightning bugs flying around it.
- Spider - Paint straws to look like spider legs and attach to the side of the pumpkin. Now all you need to carve is eyes!
- Classic Pumpkin - Think of the iconic jack-o-lantern face, and go for a classic look with this kind of pumpkin.
- Painted Face - Skip the carving altogether and tape a face onto the pumpkin, then spray paint it before taking the stencil off!
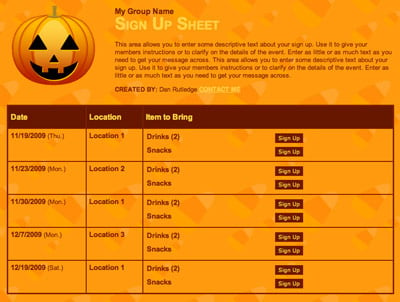
Plan a neighborhood Halloween party with an online sign up. SAMPLE
- Cyclops - Carve one big eye to easily make a spooky-looking Cyclops!
- Mummy Pumpkin - Carve out two eyes and wrap the rest of the pumpkin in gauze to look like a mummy.
- Ghost - Carve the outline of a ghost — a super easy shape that looks great and is a Halloween classic!
- Candy Corn - Dip the top third of your pumpkin in white, and the bottom third of your pumpkin in yellow to make the pumpkin look like a candy corn! It's easy, and there's no carving involved.
- Moon & Stars - Carve a crescent moon and stars into the pumpkin for a starry night scene.
- Mickey Mouse - Carve the Mickey Mouse ears — easy and perfect for Disney lovers!
- Toothy - Carve an extra big mouth with extra big teeth for a cute, toothy grin!
Medium Difficulty
- Alumni Pride - If you want to show some alumni pride, try carving your college's logo on the pumpkin. Check online to see if you can find a template.
- Fairy House - Carving a couple of windows and a door into your pumpkin will make it look like a tiny house — especially once you put light inside.
- Monogram - For a classy-looking pumpkin, carve a monogram. Great for decoration outside traditional or older homes!
- Toothpick Teeth - Carve an open mouth and stick in toothpicks to look like long, creepy teeth.
- Pumpkin Pi - Carve the mathematic symbol for pi into your pumpkin for a clever pun.
- Flaming Pumpkin - Carve some fake flames into your pumpkin so it will look like a little campfire on your doorstep.
- Witch Outline - Go classic, and carve an outline of a witch on a broom!
- Paw Print - Show your love for your favorite furry friend by tracing their paw-print onto your pumpkin.
- BOO - Carve the word BOO into your pumpkin, and you'll be sure to startle the trick-or-treaters.
- Harry Potter - The iconic scar and glasses are easy shapes to carve into your pumpkin for the perfect wizarding wonder.
- Flower Power - A cute flower design is easy to carve and looks great. Pick your favorite bloom.
- Sweet Tooth - If you're looking for a sweet design, cut out a mouth for the pumpkin, and then glue marshmallows or candied pumpkin seeds for sugary teeth. (Beware of outdoor pests - this is best kept indoor or used for party display!)
- Owl - Carve an owl, and tape on painted cardboard wings and cardboard feet for an extra touch.
- Purr-fect Pumpkin - Paint a cat face on your pumpkin with drawn on whiskers. Perfect for kids who love animals!
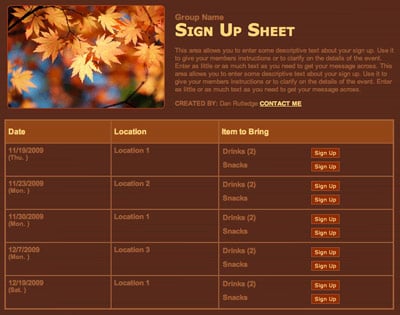
Plan a fall festival with an online sign up. SAMPLE
Try A Challenge
- Sports Team - Carve the logo of your favorite sports team — or even the jersey number of your favorite athlete.
- Tinkerbell - Carve a fairy with little dots behind her to symbolize fairy dust.
- Last Name - For a cute doorstep ornament, carve your last name into the pumpkin.
- Fall Leaves - If you're looking to continue a fall theme, carve fall leaves into your pumpkin.
- Princess Silhouette - Carve a silhouette of a princess or a tiara — a little complex, but super cute for a girly-girl.
- Caffeine Lover - For the ambitious coffee addict, try carving the Starbucks logo!
- BB-8 - If you really want to get creative, stack two pumpkins on top of each other and carve out designs to make your creation look like BB-8 from Star Wars.
- Snail - A swirling shell is a little complex, but can look great! Attach a makeshift head and antennae to make the pumpkin even more snail-like!
- Fish Tank - Carve fish of differing sizes and even some aquatic plants to make your pumpkin look like an aquarium.
- Bedhead - If your pumpkin is tall, carve an open-top with a lot of spiky hair to give a fresh look to your jack-o-lantern.
- Franken-pumpkin - Drill some holes and pull yarn through them to look like your pumpkin has spooky stitches.
- Trick-or-Treat - Make sure trick-or-treaters know they're welcome by carving this adorable message into your pumpkin.
- Charlie Brown & the Great Pumpkin - Recreate this iconic Halloween movie by carving Charlie and Snoopy into your pumpkin.
- LEGO - Carve a little LEGO minifigure into your pumpkin for fun. It's especially perfect if you have LEGO-loving kiddos.
Schedule pumpkin patch volunteers with an online sign up. SAMPLE
Tips and Tricks
If you don't have a lot of experience carving pumpkins (and really, who does?) here are some quick tips and tricks that will simplify the process and make your pumpkin look like a true work of art.
- Hold a Contest - If you already know your family won't be able to agree on one design, try a boys vs. girls pumpkin contest or parents vs. kids!
- Pick the Right Pumpkin - Choose a pumpkin that isn't quite ripe yet (hint: look for a green stem) so that it doesn't rot before you start carving!
- Make a Template - Trace your design before you start carving. This will make the process much simpler.
- Give it a Top - When you cut the hole around the stem, cut at a slant so you can place the top back on when you're finished.
- Scoop the Guts - To give young kids something to do, task them with removing the goop from inside the pumpkin and picking out the seeds afterward. If you don't mind getting messy, you could set up a station for throwing pumpkin guts.
- Make a Snack - Cook the pumpkin seeds on an oven sheet with some salt and brown sugar and they'll be a tasty treat for hungry carvers!
- Give an Assist - If you'd rather not give your kids free rein with knives, but they still want to be involved, play "Pumpkin Surgeon" and call out tools for them to hand to you as you work.
- Preserve Your Design - If you want your pumpkin to last longer, put Vaseline around the cut-out portions to seal it.
- Set the Mood - Purchase tea lights to put inside your carved pumpkin — inexpensive, and you can even get ones that flicker to give the candle illusion.
With these ideas and tips, you're on your way to carving the perfect pumpkin!
Kayla Rutledge is a college student who spends most of her time writing, singing for her church and eating quesadillas.
|

.png)
.png)


.png)
.png)

